Wednesday, July 10, 2013

Farseer Psychic Powers - Part Three

Of course, all that analysis builds to one important question: how should you select powers on your farseer?

Our psychic power lists include Runes of Fate, which we've just covered, as well as Divination and Telepathy.  All of these have strong options, but they're balanced very differently, so which tables you roll on is going to depend on what your army needs.  We've already gone over Runes of Fate, but I'll skim over the other two for the sake of cohesion.
I could never tell if he's casting the spell
or getting hit by it.

Telepathy is strong, but awkwardly balanced table.  Psychic Scream, Dominate, Mental Fortitude, Puppet Master, and Terrify are all solid powers, but they're nothing mind-blowing (do you see what I did there). Invisibility and Hallucinations are game changers; when you roll on Telepathy, you're praying quietly for a 5 or 6.  Invisibility works exceptionally well with jink saves, especially jetbike-mounted seer councils, and Hallucinations is best used against super units - guard blobs are particularly vulnerable.  

But when you go for Telepathy, be aware that you are taking a risk - you probably won't get what you want on your first roll, which means you'll need to put more rolls into the table to try and hit the Invisibility/Hallucinations jackpot.  Because of this, Telepathy can be a dangerous investment - you should only go for this table if you're willing to spend all three rolls here, and even then Telepathy is a gamble.

Divination is popularly considered the strongest psychic power list in the main rulebook, and rightly so.  Some of its powers are situational, but all of them are useful and a few are incredibly potent.  Precognition is fairly weak here because of the farseers' low number of attacks, and Scrier's Gaze, while powerful, is only relevant if you have important units held in reserve and/or are playing with mysterious terrain.  Forewarning and Foreboding grant a unit full BS defensive fire and a 4+ ward save respectively, both of which are very strong.  

With the heavy firepower of an Eldar army, giving a unit Ignores Cover shots is potentially brutal; while not especially useful in a few situations, against some armies it can be absolutely devastating.  But the real prize in Divination is Misfortune - like Doom, it allows you to substantially amplify your damage against a single target.  If you roll both of these powers, try not to cheer - it's rude to celebrate when the guy across the table is weeping uncontrollably.

Arguably the best part of Divination, and Runes of Fate as well, are the primaris powers.  While Prescience is not as strong as Misfortune, it's a guarantee; rolling on Divination is very safe, because even if you get a power you don't want, Prescience is so excellent that it won't matter; the same applies to Runes of Fate.
Unfortunately, Runes of Fate is very hit-or-miss table.  Doom and Fortune are both excellent, and Eldritch Storm and Mind War are reasonably strong, though their high warp charge cost is a big detraction.  Executioner and Death mission are trash, strong contenders with Hemmorage for the worst psychic powers in Warhammer.  What this means is that Runes of Fate is safe on your first roll because you can always trade in for Guide, and risky once you've already taken your primaris.

Optimal psychic power selection will vary based on your army and your opponents, of course, but with that in mind, let's look at what is generally the best way to generate your farseer's psychic powers.  Start with one roll in Runes of Fate.  If you roll Doom or Fortune, awesome - grab that and move on.  If not, trade it in for Guide.  Next, roll once on Divination.  If you roll Misfortune, Perfect Timing, or Foreboding, take it, and if not, swap for Prescience.  You might want another power besides those I've listed, as both tables have some situational psychics, so if that's the case for this particular game, just add them into their respective list of "good psychics."

Having made two of our three rolls, we can sit back and assess the situation.  If you got a good power off of either Divination or Runes of Fate, your next choice is easy - just roll on the table where you still have a primaris power available, and you're guaranteed three excellent psychics for the game.  If you already have Guide and Prescience, that's still a solid build for a Farseer, but nothing is guaranteed past this point.  Divination is probably your best option here because even its worst powers are still really good, but if you're feeling lucky you could go for Runes of Battle instead.  

With this tactic, you'll very frequently end up with three high-quality psychic powers, and at worst you'll have Prescience and Guide - not a bad setup at all.

Part One     Part Two

Monday, July 8, 2013

Farseer Psychic Powers - Part Two

4. Death Mission

There's really no way around the fact that Death Mission is pretty terrible.  Admittedly, in the right situation it could be decent - say, if your farseer has Soulshrive or the Shard of Vaul.  Then, you might have a chance of dealing some real damage with this power, and it could be useful in a desperate situation (as the power's text implies).  Of course, that would require you to spend points preparing for a power you don't want...

His armor is made from the
bones of farseers who
make poor decisions
While +5WS, BS, I and +2A is a really strong buff, it's being applied to an initially weak character.  Farseers are sub-par in melee compared to other psykers, let alone a combat-dedicated character.  Of course, you don't necessarily need to deal damage with a farseer, and maybe that WS10 will keep him alive until you can mount a counterattack, but even that is irrelevant due to Death Mission's restrictions.

The first drawback is that this spell can kill your farseer.  When Death Mission is used, the psyker generates D3+2 counters, which he has a 50% chance of losing at the end of each phase, and when he runs out of counters, he dies.  So on average, you'll get 4 counters per round by recasting the spell and lose 3, which should sustain your farseer reasonably well.  However, it's very possible for a few bad rolls to kill your farseer very quickly, and failing your psychic test is probably a death sentence, so let's hope you're not playing against Tyranids or Space Wolves.

That's still not the worst part though, because once you've cast Death Mission, your farseer cannot use any other psychic powers for the rest of the game.  Here we come to the crux of the problem: even if you manage to save your farseer with Death Mission, who cares?  He's not guiding or dooming anything else - all he'll do for the rest of the game is run around waving his witchblade, hoping he keeps passing those 4+ rolls and psychic tests.  So unless you cast this on the 5th turn, your farseer is now a mediocre combat character and nothing else, and even then, why would you want a power you won't use for most of the game?  Even the name "Death Mission" is terrible, and its two warp charge cost is insult following injury.  This is without question the worst power available to farseers, and when rolled should be immediately discarded for Guide.  If you have the Eldar psychic deck, I suggest burning the card so that you're never tempted to dirty your farseer with this awful power.

5. Fortune

Much like Guide, Fortune remains essentially unchanged from previous editions, except for it's new 24" range and ability to target allied units, though it's warp charge cost has also gone up to two.  While not as overwhelmingly powerful as Doom, Fortune fills an important defensive niche in the farseer's arsenal.  However, unlike Guide and Doom, which are excellent in any situation, Fortune's usefulness is dependent on the Eldar player's army composition.

Bonus points if you play this every time you re-roll
your saving throws
To make the best use of Fortune, you need units with strong saves; the closer to 2+ the unit's armor/invul/cover save, the more useful Fortune becomes.  Cover and invulnerable saves are especially potent when reinforced by Fortune because your opponent cannot circumvent it with low AP weapons.  For this reason, Conceal stacks especially well with this power, as does Protect, both from the warlock psychic list.  Of the units available to Eldar, warlock councils and wraith units are the most viable targets due to their solid saves and high toughness (for Eldar).

Fortune is a more difficult power to use than Guide because it requires you to determine what target you opponent most wants to kill: using Fortune on a unit the enemy can ignore means you've wasted it.  To complicate this, use of Fortune can alter your opponent's target priority.  A fortuned wraithknight might not be worth shooting anymore, for example, so while it's possible you'll save him several wounds, he might also cease to be a fire magnet, leaving your next most prioritized unit vulnerable.

6. Mind War

A potentially strong power, Mind War has changed slightly from its previous incarnation in a few ways.  It's range has increased to 24", the wounds inflicted ignore cover, and the loser of the leadership roll-off has his WS and BS reduced to 1 for the rest of the turn.  It's warp charge cost has also risen to two.  Aside from the higher cost, Mind War has become significantly stronger.

It looks exactly like this, I swear.
100% legitimate representation of a psychic duel
In addition to dealing damage, the WS reduction allows you to set up devastating charges: shredding a monstrous creature's combat ability prior to a charge while knocking off a wound or two is a really nice option to have.  The longer range lets your farseer maintain a safe position while weakening or killing single models.

Bear in mind that because of the 6th edition psychic power changes, Mind War is not a reliable way of sniping targets inside of units.  As a focussed witchfire, Mind War suffers the same 28% chance of the caster selecting his target, which means most of the time you'll be rolling off against 5pt guardsman instead of the commissar you're trying to kill.  But while its days of killing nobz out of ork mobs are over, Mind War remains a very strong tool for killing monstrous creatures and other single models, and should find good results if used as such.

Part One     Part Three

Sunday, July 7, 2013

Farseer Psychic Powers - Part One

It's Eldar time, and we're going to start with farseers' psychic power options. These have been revamped for 6th edition, list of randomly-generated powers and all.  Let's get moving.

0. Guide (primaris)

Guide has long been a staple Eldar power, and with this edition it's been improved dramatically: range went from 6" to 24", and it can now be cast on any allied model (not just Eldar).  It's solid, reliable, and useful, whether you're running pure Eldar or taking allies for Tau or Dark Eldar.  I don't really need to stress that twin-linking a units shooting is really good

It's worth noting that, unlike the Divination primaris power Prescience, Guide does not affect close combat.  However, the 24" vs 12" range is a significant extension, as it allows the farseer to remain in a safe position even when your army is spread out.
Nobody wants an autarch on the cover

1. Executioner

Three/two/one hits, with fleshbane, and you can pick the targets - Executioner certainly has the potential to be an excellent psychic.  But the restrictive elements of the power - unreliable target selection and damage - mean that most of the time, the power will be disappointingly weak.

Executioner is a focussed witchfire, which means that you can only select its target(s) if you roll a 5 or less on your psychic test.  On 2d6, you have a 5/18 chance of making that roll - slightly less than one-third.  If you cast Executioner seven times during the course of the game, you'll probably get to choose who it hits twice.  You have the potential to snipe out a chaos banner, special weapon, or sergeant with Executioner, granted, but your chance of doing so on any given attempt are pretty questionable.

The other limit to Executioner is how its damage works: you have to kill the first target to generate more hits. And while three fleshbane hits are decent, they're pretty weak for a psychic power.  You've got an 83% chance of killing a space marine, then a 56% chance of killing the guy next to him, and finally a 28% chance of killing a third guy, but because the power requires a to-hit roll and the target can Deny the Witch, those numbers are actually 69%, 46%, and 23%.  Rather underwhelming.

Retro lightning
True, against high toughness, low save targets the spell is somewhat more useful.  But the low chance of sniping targets, coupled with its low damage, means that Executioner probably isn't worth its warp charge cost except in a few situations.

2. Doom

Much like Guide, Doom is a solid, reliable, and enormously useful spell.  It fills a similar role in the Eldar arsenal by amplifying the damage output of your army.  This iteration of the power is especially potent because in addition to allowing re-rolls to-wound against an affected target, it can also be used on vehicles, letting your army re-roll armor penetration rolls instead.

Doom will be less effective against armies with lots of small units, but even in that situation it functions similarly to Guide.  Its main downside is the the enemy can Deny the Witch, making Guide somewhat more reliable.  However, where Guide will amplify the damage of one firing unit, Doom has the potential to boost the damage of several of your own units.  Large terminator units, Necron wraiths, monstrous creatures, and similar high-priority targets that require an enormous amount of firepower to bring down are excellent targets for Doom.  And by using Doom and multiple Guides, you can multiply your damage output to really ruin somebody's day.

"Yer a wizard, Eldrad"
Of course, Doom is not a primaris power, so while it is brutally effective, you shouldn't rely on having it every game.  But if you can pick it up, Doom is even more useful than Guide, though a little less reliable.

3. Eldritch Storm

This psychic has seen a substantial power spike from the last Eldar codex, which is compensated for by its Warp Charge 2.  You can't spin around vehicles anymore, but the power is moderately powerful and flexible.

While still S3, Eldritch Storm now has fleshbane and haywire.  High toughness units are especially vulnerable, but a large blast that always wounds on a 2+ is dangerous against any target.  The haywire rule makes the storm very effective against groups of vehicles, particularly vehicle squadrons.  The hits will most likely be glancing, but having the option of softening up or finishing off a vehicle with Eldritch Storm makes it a very solid damage dealer.

Because it's dangerous against almost any target and has an excellent (for a witchfire) 24" range, rolling Eldritch Storm will almost always be useful.  The double warp charge cost is problematic, but that's what your spirit stone is for.

Part Two     Part Three


Tuesday, June 4, 2013

Railgun vs Ion Cannon

"The railgun is dead... and we have killed him" (Friedrich Nietzsche).

Okay, I may have modified the phrase slightly (and we all know Nietzsche played Chaos).  But an overused quote from a dead philosopher is always an acceptable opening to an article.
He has absolutely nothing to do
with this article, but my god look
at that magnificent mustache

The quote's dubious origin doesn't make it less true, though - railguns in the Tau arsenal are much less potent, despite the Hammerhead's version being unchanged in the new codex.

Hammerheads and their traditional railgun armament have always been a staple of the Tau army in past editions for a few reasons.  Their high armor value (for a skimmer) makes them very durable, and the railgun's is capable of bringing down heavy vehicles with its S10 AP1 shot or cutting through infantry with the S6 AP4 submunition's large blast.

None of this has changed in the 6th edition Tau codex.  While the loss of multi-trackers and the new disruption pod rules are detrimental to the Hammerhead, the drop in points cost more than makes up for these losses.  Being an inexpensive, durable, long-range vehicle with flexible firing options makes the vehicle a very attractive choice that fits into pretty much any Tau composition.

I'd like to stress here that I am not arguing railgun-armed Hammerheads are weak.  Everything listed above is absolutely true.  However, the railgun is eclipsed in every important way by the ion cannon because of the role a Hammerhead fills in a Tau army, and we'll go into that argument now.

Let's take a detailed look at how a railgun compares to an ion cannon:

Railguns offer 1 shot at S10 AP1, or a large blast at S6AP4.  Ion cannons offer 3 shots at S7 AP3, or a large blast at S8 AP3, with a chance of overheat.


The two important questions to ask here are 1) What does a railgun kill better, and 2) What should we be shooting with our Hammerhead?  Obviously the choice of weapon modifies question two, but bear with me for a moment.

More functional, though not nearly as stylish
S10 AP1 makes the railgun better at killing any AV 13 or 14 vehicle, granted; at AV 12, the multiple shots from the ion cannon more or less balances it out - the railgun is still better, but the difference is small enough to ignore.  The AP1 of a railgun also makes it more effective against anything with a 2+ armor save.

The ion cannon is better at killing everything else in the game.

That isn't a fair statement to leave on its own, granted - you do need something in your army to deal with heavy targets, and the railgun provides it.  But this is where our second question comes in - of those targets the railgun is more effective at killing, should you be firing the Hammerhead at them?  A single S10 AP1 shot is not a reliable way of bringing down a landraider, since it's reasonable to assume that a competent opponent will have given it some kind of cover or invulnerable save.  Even if the shot hits and gets through, you need a 5+ to penetrate, and a 4+ to destroy.  So, if we assume a 5+ cover save, you have a 2/3 * 2/3 * 1/3 * 1/2 = 2/27 chance of killing a land raider per railgun shot.

Goodnight, sweet prince
Things are even worse against models with 2+ armor.  Small targets like terminators are a terrible waste - you would most likely do more damage with a submunition than a solid shot against a unit with 2+ saves, so we'll leave them out of any calculations.  This leaves us with monstrous creatures, very few of whom have 2+ saves -  non-winged Hive Tyrants and Riptides being the notable exceptions.  The tyrant is just going to take the hits on his Tyrant Guard or shrug it off with FnP, making the railgun not particularly effective.  Riptides are unfortunately so durable (or not, you are playing Tau) that railguns are an enormous waste here as well.  Even if we assume the Riptide doesn't have FnP or is generating a 3++ save, a railgun shot has a 2/3 * 5/6 *2/3 = 10/27 chance of inflicting a wound.  You'd need three hammerheads firing for five turns uninterrupted to bring down just one Riptide.

Simply put, railguns are an enormously ineffective way of dealing with heavy targets because despite the weapons power, it's just one shot.  If you want to bring down heavy vehicles, you should be using fusion blasters, riptides in combat, or even EMP grenades - all of these are readily available to a Tau army, and are much more cost-effective ways of taking down vehicles.  Against monstrous creatures you'll find massed S5 firepower, plasma, fusion, or ion-accelerators are enormously cost-effective solutions than a Hammerhead.

To be fair, the numbers I list above could be easily modified via markerlights, boosting BS and negating cover to give the railgun a more reasonable damage output.  But consider that those markerlights could be spent just as easily on one of the alternative units listed above, and to much greater effect - why spend three markerlight points on a single Hammerhead when you could do the same for four Piranha?

Terran has been waiting 15 years
for this rules update

Compare this to the ion cannon.  Granted, 3 shots at S7 AP3 isn't overwhelming, but it's a solid choice against monstrous creatures, transports, and any single model with a 3+ save.  Most of the time, though, you're using the ion cannon for that beautiful S8 AP3 template.  Unlike the railgun submition, an overcharged ion shot is a threat against anything with a 3+ save and causes Instant Death against T4 models, making it especially effective against multi-wound units and infantry with FnP.

So in summary, the ion cannon is superior to the railgun because it lets your Hammerhead's do its job more effectively.  Most of the Hammerhead's power comes from its template, where ion has a clear advantage.  And while the railgun may be more useful against certain targets, it's important to understand that these are not the targets a Hammerhead is good at killing in the first place.

Leave other units to deal with the land raiders and riptides, and let your ion cannon do what it does best - killing everything else.


Thursday, May 2, 2013

Fire Warriors are King

Fire Warriors outclass most other Troop choices in the game because of their hyper-focused role  and incredible damage efficiency.

Yes, they're fragile, and yes, they are very weak in melee.  Fire Warriors also have a low base Ld.  They are not a well rounded, versatile unit like a Tactical Squad.  These weaknesses are irrelevant though, because Fire Warriors have exactly the right attributes to serve their role in a Tau army.

A Fire Warrrior's only strength is shooting, but that's exactly what we want.  Because of this narrow focus on one style of combat, Fire Warriors damage output and durability is fantastic for such a low-cost unit.

He's like Clint Eastwood with hooves
Fire Warriors don't need a high leadership because a nearby ethereal gives them Ld 10, and having a low weapon skill, strength, and initiative doesn't hurt Fire Warriors because they're going to lose combat anyway.  A unit of marines will win combat against guardsmen or gaunts, but any combat-focused unit such as Bloodcrushers will butcher either unit just as quickly.

Their 4+ armor save is just high enough to make them resistant to anti-infantry fire, which is all that they need.  An AP2 or 3 weapon will kill a marine just as easily, and most AP4 weapons - assault cannons, autocannons - are intended for killing high toughness targets or light vehicles. Killing Fire Warriors with S7 weapons is a waste, but if an opponent does decide to focus a unit with low-AP weaponry, they are inexpensive enough that it's usually worth going to ground.

The S5 of pulse rifles is a big part of this effectiveness.  It lets them cut down low toughness targets easily, but more importantly it also makes Fire Warriors a threat against transports and monstrous creatures.  A T6 Bloodthirster makes bolters worthless, but not pulse rifles.

But more important than anything else: pulse rifles can rapid fire at 15".  This is an enormous advantage for the Tau because it allows you to unload heavy fire into an infantry unit while being very difficult to assault.  Even being 14" away isn't a problem, because you'll be killing some or all of the targets within rapid fire range with your shooting, leaving the enemy unit 9 or 10" away from you.

In most situations, the risk of missing the 2d6 assault roll would be worthwhile, especially if you have a way to re-roll the charge dice.  But Supporting Fire will either force your opponent to abandon their charge, or punish them for deciding to try.  Unsupported, the 36 snap shots from a full unit of rapid firing Fire Warriors while affected by Storm of Fire will likely cause one or two casualties, but a smart Tau player will have his units interwoven - charging one unit will likely mean suffering overwatch from three or four others.  A full unit of assaulting enemy models will have men leftover, but the overwatch casualties will turn an unlikely charge into a near impossible one.
Pulse rifles don't care about
your storm shield

Granted, this tactic won't work against bikes, cavalry, beasts, chariots, or jump infantry - 15" rapid fire isn't foolproof.  You'll be able to focus down some of these units before they reach your army, but some will inevitably make it through and crash into your Fire Warriors.  But that's okay too, because despite the potency of their firepower, a full unit of Fire Warriors costs slightly more than 100 points - they're not a high value target, even if they hit like one.

Other units can put out similar or superior amounts of firepower, but none so inexpensively.  And more importantly, none of these heavy fire units are Troops.  Fire Warriors don't take valuable composition slots away from the rest of your army, a problem that forces some some codexes to take undesirable Troop choices just to hold objectives.  But a Tau player can fill all of his army's anti-infantry needs and simultaneously give himself several scoring units.

You'd be hard pressed to build a bad Tau army by starting with six units of twelve Fire Warriors, because they're just that damn good.

Tuesday, April 30, 2013

The Purpose of Riptides

Riptides, the newest addition to the Tau arsenal, are the most interesting unit in the new codex.

Is it worth using? Riptides are obviously a strong unit, but their base cost is also very high.  They're tough to kill, sure, but a Riptide's damage output isn't that great for how much you're investing.

A Riptide's real strength lies in it's flexibility.  It functions as a Swiss army knife for the Tau army; properly equipped, a Riptide can handle literally any unit type in the game.

It doesn't actually kneel to fire -
he's just mocking the fire warriors
Let's work from here: the Riptide's best weapon option is the ion accelerator and fusion blaster.

Granted, a heavy burst cannon/smart missile system set up is better against light or medium infantry, and ion accelerator/plasma gun is better against heavy infantry.  But those setups are still less useful than ion/fusion.

The reason ion/fusion is the most effective combo is because of what the Riptide is supposed to do.  Yes, it can fill several roles in your army, but if you want to mow down infantry, why are you using a Riptide when 24 fire warriors will do the same job much better for the same cost?  Or a unit of broadsides with missiles?

If you compare it to a more specialized unit in the Tau army, a Riptide will always lose out to missile broadsides, double plasma crisis, fire warriors, etc.  It is not cost-efficient for its damage output.  But despite this, Riptides are fantastic, because their job isn't to be a massive firebase like those units - Riptide's job in a Tau army is to provide stability.

While another unit might deal with one kind of target more efficiently, it's important to realize that an ion/fusion Riptide can deal with all of the targets you'll face, in every game you play.  You can kill heavy infantry and light vehicles (firing normally); monstrous creatures (firing normally); heavy vehicles (nova-charging the fusion blaster or melee); normal infantry (ion large blast); and by taking a velocity tracker, it can also shut down flyers.

Ion is the new hellfire. And kraken.
And vengeance.
Horde, flyer spam, drop pod rush, whatever - no matter what bizarre, frustrating army list an opponent throws at you, the Riptide will always be able to handle it.  They'll always be a problem unit for the enemy army.

And unlike most units of this variety (cough*sternguard*cough), they are incredibly difficult to kill.  You can't just deal with a Riptide and move on to the next thing.  With a 2+/5++ save, FnP from an etheral, and being able to nova-charge to a 3++, Riptides are the single most durable model in 40k.

This doesn't mean that every Tau army needs three Riptides.  What's important to understand is that they can fill any gap in a Tau army nicely - a Riptide's ability to alter the specialization of its firepower each turn gives it unmatched in-game flexibility.

Thursday, April 25, 2013

Updated Piranha Tactics

Piranhas in the new Tau codex are a solid, inexpensive unit that can be fill multiple roles very effectively.

There's nothing awe-inspiring about Piranhas - they don't offer massive damage, and they're fairly easy to kill if your opponent decides to focus them.  But they fill some important gaps in a Tau army, and you can use them in a variety of different ways, which is what makes Piranhas such a strong choice in almost any Tau composition.  It's also worth noting that Piranha are incredibly cheap for what they do - if you subtract the cost of their drones (14 for drone units), Piranhas cost just 12 points each.

Piranhas excel at a few specific roles: Hunting down hard-to-reach units, Tank Killing, and Screening other units in your army from assault.
It's hard to find a greater good
than 12 point skimmers

Hunting: Piranhas are fast skimmers, which lets the move 12" and fire at full BS.  Gun drones now count as passengers, which means that they can only fire snap shots if the Piranha moves more than 6".  If you flat out with a Piranha, you can move an additional 18" in the shooting phase instead of firing for a total distance of 30".

Because of this immense mobility, Piranhas are great at cleaning up lightly-armored enemy units that the rest of your army may have difficulty getting to.  Small units of cultists, guardsmen, gaunts, or other inexpensive troops are useful for holding objectives in your enemy's deployment zone, especially when they've set that objective behind a building or other terrain that blocks your LoS.  Deploying 12" forward and jumping 30" on the first turn means your Piranha can hit anywhere on the board come turn two with a barrage of S5 AP5 weaponry - exactly what you want to chew up cheap objective holders.

Even if your enemy decides to counter this move, a unit of Piranhas is surprisingly durable. Front armor 11 makes them resilient or immune to most infantry weapons, and their 4+ cover save from moving flat out will let them soak up a lot of fire before going down - probably more than your enemy is willing to commit to put down a full unit.  Better still, you can detach your gun drones on the second turn to force him to deal with an additional target roaming around his backfield.

S8 AP1 vs unsuspecting cows
Tank Killing: The most traditional role for Piranhas is using fusion blasters to gun down enemy vehicles.  This is certainly the least innovative of its three roles, but important to mention nonetheless.  Piranhas are especially useful as tank killers because they allow you to free up your Heavy Support and Elites slots for other uses, while arguably doing the job much more efficiently due to their high mobility and low points cost.

Piranhas are especially talented at downing vehicles with the fusion blaster's new 18" range.  Because you can move 12" and fire at full BS, and get 2d6 for armor penetration rolls within 9", you now have an effective threat range of 21" for taking down heavy vehicles.  Even the base damage of a fusion blaster is solid for taking down smaller tanks, especially due to the AP1, and they can serve as decent monstrous creature hunters against vehicle-light armies.

Screening: This is the most important use for Piranhas because it mitigates the Tau army's glaring weakness: close combat.  Against some opponents you'll have time to deal with the terminators or plague marines slogging their way towards your lines, but plenty of lists can shove three or more major threats in your face on their first turn, and you might only have the firepower to eliminate one of them.

A well placed Piranha unit can negate this problem, at least for a turn or two.  Leaving your army to deal with the most important target, you can spread a squad of Piranha out just in front of your army to screen your fragile fire warriors and battle suits from enemy attack.  A Piranha has a wingspan of about 6".  Since enemy models need to stay at least 1" away from your Piranhas (unless they're assaulting the unit), you can create a 40" wall in front of your army by carefully spreading out a full unit - 6" per vehicle, plus an additional 1" on each side of the wings.
"Great Wall of Skimmers" is a little less catchy

You probably won't need a full 40" screen very often, though it's a nice option to have.  What's important, though, is that you only lose 10" of your screen for every Piranha we remove from the unit, so you can use this tactic very effectively with just a unit of three to provide a 20" screen.

It's important to be careful of an opponent destroying one or two Piranhas and charging through the breach, but this is where the gun drones come in.  By detaching the drones before your skimmers move and using their thrust move to re-position, you can set up the drone squadron as a fail-safe screen.  It won't block off as wide of an area as the Piranha  but you can make sure a vulnerable section of your line is doubly safe against assault.

Are you going to lose your Piranhas with this tactic? Almost certainly.  Your opponent is either going to go around you, create a gap, or absolutely trash the Piranhas that are in his way.  But the screen should be able to cover your entire army if you set it up right, and that means you'll be able to unload a monstrous amount of overwatch into whatever decides to charge the squadron   And whatever's left over is sitting right in front of your army for fire warriors to triple rapid fire it into a bloody smear.


Wednesday, April 24, 2013

Skyrays: Preemptory Strike Tactics

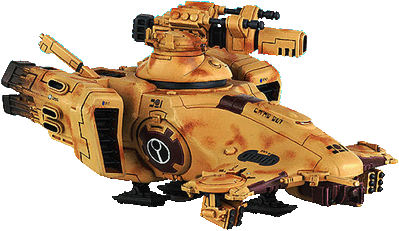
In a metagame over-saturated with flyers, Skyrays are fantastic.  Durable, high-damage and with the option to skyfire, that rack of seeker missiles is a highly effective countermeasure against fliers or flying monstrous creatures.

Just imagine it has smart missiles
That isn't the best part, though.

The most attractive aspect of the new Skyray is that it can empty its entire cache of missiles during the first turn of the game.  Unlike in previous editions, seeker missiles are no longer limited by markerlights to fire.  Each seeker missile fired via markerlight has BS 5 and ignores cover, which is nice, but not really ideal for the Skyray.  Rather than spending six markerlights to fire off the missiles, you can spend three for the same effect (assuming you have pathfinders available) - one to raise the Skyray to BS 5, and two to negate the enemy's cover save.  And if cover's not an issue, the Skyray's networked markerlights can handle the BS 5 on their own.

Firing six seeker missiles into a single target right as the game starts will be crippling against some armies.  Multi-wound units, including monstrous creatures, are fantastic priority targets for a Skyray, as are vehicle squadrons (of armor 12 or less) or particularly expensive enemy units.  Sometimes an army has a unit that has to die right damn now, and pumping S8 AP3 missiles into it is a great way to accomplish this

(A quick note before we go on - yes, there is a rule that states a vehicle can only fire two missiles per turn.  However, this rule specifically applies only to fliers, which the Skyray is clearly not.)
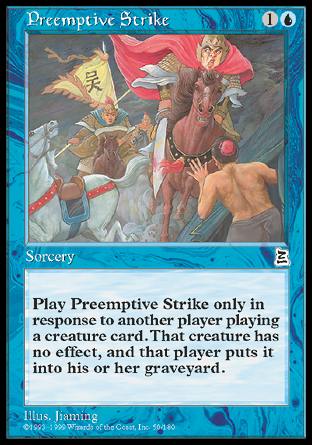
Six seeker missiles aren't a counterspell...
but they're pretty close

The frontloaded firepower of a Skyray is viciously effective if used well - you can burst down an enemy unit when they're not expecting it, or demolish a key target they were expecting to survive for a few turns.  Coupled with these missiles being skyfire, Skyrays are especially devastating against Tyranids with winged hive tyrants, or Daemons with Bloodthirsters or Daemon Princes.  With six shots, you've got a solid chance of killing any monstrous creature (without a 2+ save) immediately.

Using all of your seeker missiles immediately limits the Skyray's uses later in the game, of course, but unless your opponent had a more important target held in reserve, being able to eliminate a 200+ point monstrous creature before it can do any damage to your army, courtesy of your 115 point Skyray, is almost always going to be worthwhile.

This early-strike tactic will leave you more vulnerable to fliers later on in the game, but the Skyray's pair of markerlights are still fantastic as anti-air.  Because they're skyfire, you can use this pair of markerlights to give other units in your army with fusion blasters, missile pods, or railguns BS 2 or 3 and let them put down the flier.

There are a few downsides to this tactic.  You can't move your Skyray on the turn you unload, which means no jink save, and sometimes it's better to wait and use the missiles to deal with units that become a problem later in the game.

With that said, you're going to want to unload your Skyrays on the first turn of most games.  There will be times you'll need to be patient, but being able to devastate a target immediately is a brutal trick to have in your back pocket when you need it.


Tuesday, April 23, 2013

Sniper Drones: Nature's Perfect Killer

Sniper drones are goddamn terrifying.

Here we see the
beast in its natural habitat
Just looking at this sleek, bloodthirsty killer is probably enough to make your blood run cold. But maybe that's not enough to convince you; I'll go into more detail.

Sniper drones can lay out a devastating amount of firepower with their BS5, rapid-firing, 48" range sniper rifles - pulse weapons, so they benefit from an ethereal's Storm of Fire invocation.  This means that when your target is within 24", each sniper drone can fire three shots.

Plus, sniper drones have stealth.  And they're T4.  And they can move and fire, then make a 2d6" thrust move when they're done.  All this for just 15 points a model - just 148 for a full unit of nine drones and their accompanying firesight marksman.

If you're not sure how that translates into damage output, consider this: they can drop any greater daemon in one round of fire, with just one unit of drones.  27 shots, 24 hits, 12 wounds, oh look that Great Unclean One is dead.  No problem.

Iron Arm making you T9 this round?  Too bad, these tiny murder machines don't care.  Even against armored targets, 1/3 of your wounding hits are going to rend - that hive tyrant's not gonna last much longer than the greater daemon.

Target acquired
The strength x is ideal against high toughness targets, of course, but sniper drones are solid infantry killers - those 12 wounds, including 4 rends, are going to drop most of a space marine unit with each volley.  Not to mention that this volume of firepower means a lot of precision shots, so you can easily take out heavy weapons, sergeants, or chaos banners before they become a problem.

The only thing they have trouble with is vehicles.  But that's what the rest of your army is for, right?

Keep Your Ethereals Alive

Tau ethereals are fantastic, but they're a big target and easy to kill.

Last edition, it wasn't a problem at all - you just never took ethereals.  The re-rolls on leadership they gave your army simply wasn't that big of a deal, especially considering that a dead ethereal could see half your army panic and run off the table.

In 6th edition, Tau ethereals are probably the most cost-efficient unit in the entire game.  Yeah, their drawbacks are huge - losing an ethereal means an extra VP for your opponent, which can easily cost you the game.  But for 50 points, the 12" bubble of effects they provide for your army is brutally powerful.  6+ FnP for most of your army is incredible - it's a slight chance, yeah, but for the whole army? 50 points is a bargain.  Or you can be stubborn if you need to keep someone locked in combat - on the ethereal's Ld 10, no less.  Being able to run and snap-fire isn't anything special, but it's nice to have.  Mostly, you're taking an ethereal for that sweet, sweet bonus shot with rapid-firing fire warriors.

Unfortunately, all these abilities come in an very fragile package.  Two wounds, no saves, and T3 means that anything that hits your ethereal will kill him.

"I'll just hide him in the back," you might say.  "My twelve-man fire warrior unit will keep him safe."  A small unit of fire warriors isn't going to protect him from a competent opponent, however.

This isn't to say that hiding your ethereal in an infantry unit is necessarily a bad play - in some games, that's going to be your best bet.  But you won't always be able to rely on that tactic to keep such a high-value target alive.


There are three primary ways for an opponent to kill your ethereal:

1. Precision Fire
2. Overwhelming Firepower
3. Assault

Most anything your opponents will throw at you is going to break down into one of these categories, or a combination of the two, so let's go over ways of dealing with each of these possibilities.

1. Precision Fire is a problem because it can pick your ethereal out of the unit protecting him.  This can come from several sources: characters, snipers, focused witchfire psychics, and Tau battlesuits with an advanced targetting system.  

Against all of these, fortunately, you get a 2+ Look Out Sir! roll for being an independant character, so precision fire isn't a major concern unless your opponent is drowning in snipers; it takes 36 shots from a precision weapon to actually land a hit on your ethereal (1/6 chance of rolling a 6 to hit, 1/6 chance of failing your Look Out Sir!).  If someone can fire 72 sniper shots into a tau unit before you can kill the enemy snipers, or if you roll a lot of 1's, this could be a problem, but most armies won't be packing a massive arsenal of snipers.  
On the off-chance that this is a issue, your only real option is to hide your ethereal, either behind terrain that blocks LoS or behind one of your vehicles.  Keeping the ethereal inside a devilfish is also a sound strategy, provided you can keep the transport alive.


2. Overwhelming Firepower is what you really have to watch out for.  Most individual Tau units aren't particularly durable, and if an opponent with a decent shooting phase decided he wants the unit of fire warriors sheltering that ethereal dead, there's a good chance he'll be able to pull it off.  Cover will alleviate this problem to an extent, and going to ground is definitely a nice option, but be careful with this; if that unit hits the deck the ethereal won't be able to leave for a full strength unit in your turn.  And if they do manage to wipe out your unit, then your ethereal is easy prey for anything the opponent wants to throw at him.

Shield drones are the simplest way of sheltering your ethereal from enemy fire.  It's not foolproof, but that extra pair of wounds with a 4++ save increase his survivability enormously.  Better still, if your ethereal needs to move to another unit, the drones come with him.  24 points is a reasonable investment for keeping such a high-value character alive a little longer.  Hiding the ethereal behind cover or a vehicle works here, too - even if the rest of your unit is being butchered, the excess wounds won't lap over onto a target the enemy can't see.

Probably the best way of handling massed fire, though, is to join your ethereal to a riptide.  In order for this to work, your riptide will need to have shielded missile drones accompanying him, ideally two of them.  Characters aren't allowed to join single monstrous creatures, but they can fit into a unit of them - just like Necron players can toss their lords into tomb spider units, you can slide an ethereal in with a riptide and a pair of drones.  Seven wounds at T6 is a lot harder to burn through before reaching your etheral, especially with that 2+/5++ save.  And if you're really worried about heavy weapons fire, the riptide can boost his save to a 3++ (probably).  The only downside to this is that it limits the mobility of your riptide, because you need the ethereal in the center of your army, but giving your ethereal a monstrous creature as a bodyguard is probably worth it.

3. Assault is a concern for all Tau units, of course, but enemy units of bikes, cavalry, or beasts are especially capable of scooting past intervening units and charging into your ethereal's unit, especially if your opponent can shoot up intervening units to clear them a path.  You might abandon a unit of fire warriors or drones to their fate, hoping they die quickly so you can shoot up the unit that just charged into your lines, but abandoning an ethereal to his fate is a poor option.

Of course, your best plan will be to keep the ethereal out of combat altogether; that honor blade might make him S5, but he's still going to die to anything stronger than a couple of guardsmen in melee.  Prioritizing fast assault units will help, as will layering fire warrior and drone units in front of the ethereal's own squad - just be careful of presenting an attractive multi-charge target.  Supporting fire is enormously helpful here, though - with your army clustered around an ethereal, anything trying to assault his unit is going take heavy casualties from overwatch.

Your other option is to keep a counter-charge unit around to deal with whatever hits your lines.  This is tough to do with units inside the Tau codex, unfortunately.  Kroot, even with hounds, aren't capable of standing up to a dedicated assault unit most of the time.  Eldar offer howling banshees, striking scorpions, and harlequins, each of which does decent damage, but in addition to being very fragile, eldar units tend to be horribly over-costed; I'm hoping they'll be more useful allies when their new codex releases.  Space Marines are your other battle brother, giving you assault marines or assault terminators as strong counter-attack options.  Both of these are pricey, but hard-hitting and tough to kill.  Ork shoota boyz are a great cheap way to tarpit enemy attackers, with the added advantage of being incredibly cheap.


Special characters:

The two special character ethereals, Aun'va and Aun'shi, are also potential ways of keeping your opponents from murdering your ethereals.

Aun'va's signature system, the Paradox of Duality, gives him and his honor guard an additional saving throw equal to the AP of the enemy weapon shooting them.  This is nice on paper, and Aun'va's bonus rules are great - he's even more cost-efficient than the standard ethereal, and if you can keep him alive Aun'va is fantastic.  The problem is that it's just him and the honor guard - four wounds of T3 Tau before Aun'va is on his own.  Worse, Aun'va is not an independant character. He only gets a 4+ LoS roll, and when his honor guard die he cannot join another unit - he's stuck being a sweet, juicy target.  You can hide him behind terrain or a vehicle, of course, but these are risky options at best.

Aun'shi is essentially a sturdier version of the standard ethereal.  You're paying an additional 60 points to get him, but he has an extra wound and comes with a 4++ save from his shield generator, which more than compensates for not being able to buy drones.  He's also much more durable in combat due to his WS5 and being able to either rend or re-roll invulnerable saves in a challenge, but you probably shouldn't rely on these - while he might be able to survive for a round or two, he's not going to win that combat on his own.  Aun'shi's best looked at as a way to protect your investment - for those extra points, your ethereal is substantially harder to kill.


You've got a lot of tools at your disposable for keeping your ethereal alive - now you just have to decide which method fits your army (and is most likely to frustrate your opponents).